
Make your first reel
From a video to a 9:16 reel in a few minutes. The pictures below are the real extension.
- 1
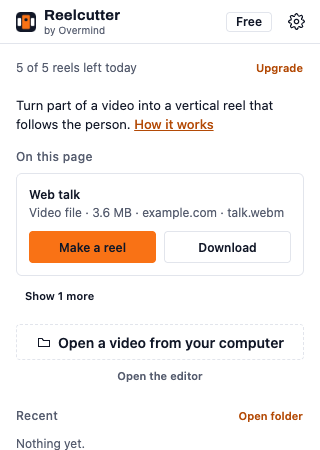
Open a video
On a web page that plays a video, click the Reelcutter icon in the toolbar. It lists the videos it noticed on the page: choose Make a reel. If nothing is listed, start the video and open Reelcutter again.
For a video on your computer, choose Open a video from your computer instead. MP4, MOV, MKV and WebM all work.
- 2
Choose the part
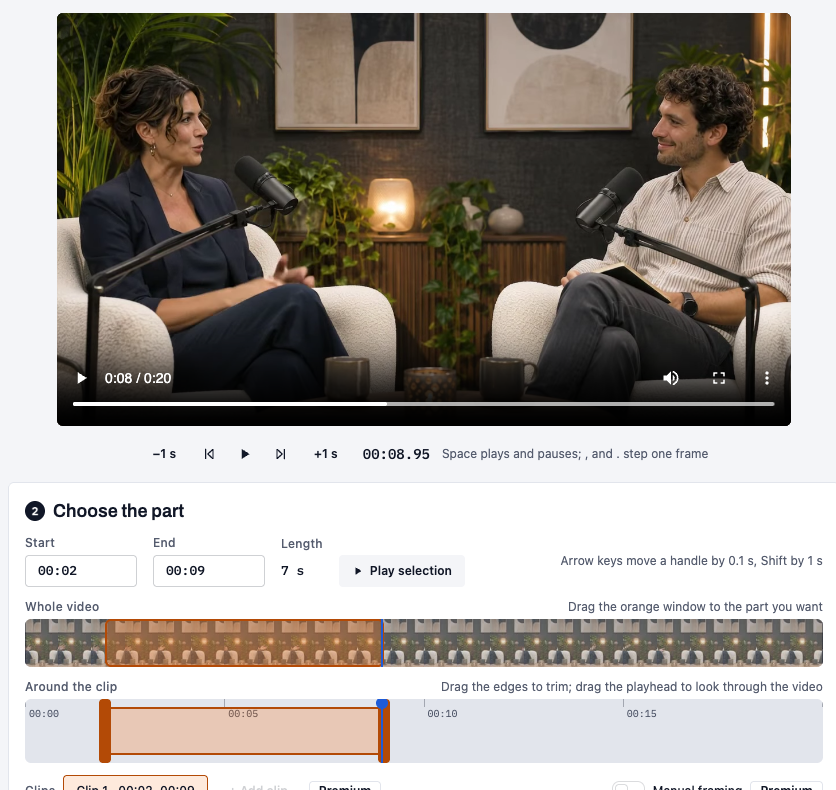
The editor opens with the video. Drag the orange window on Whole video to the moment you want, then drag the edges on Around the clip to trim it exactly.
You can also type the start and end, or select a handle and use the arrow keys (Shift moves by a second). Play selection plays only your part.
- 3
Make the reel
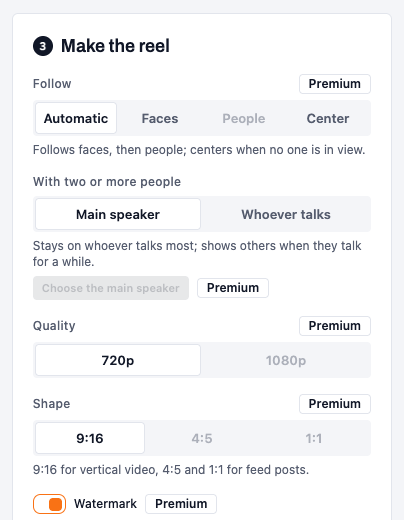
Under Follow, Automatic is the best start: it follows faces, then people, and holds a centered frame when no one is in view. Click Make reel.
Reelcutter finds the person, moves the frame smoothly and reframes on the exact frame at every camera change. You can keep working while it renders.
- 4
Find your reel
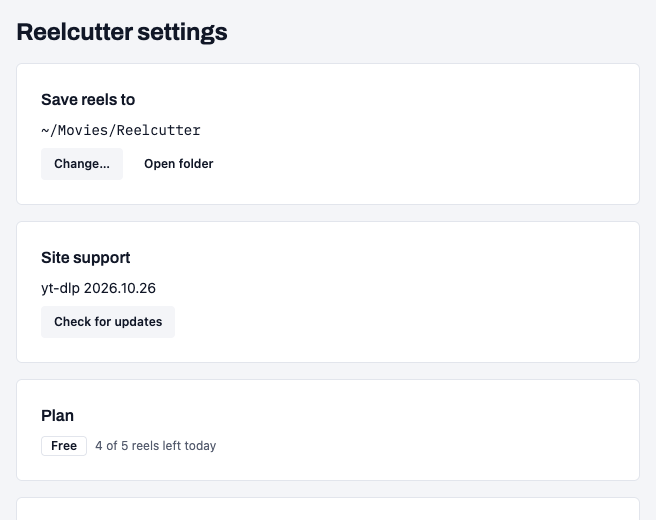
Finished reels are listed under “Reels and downloads”. Show in Finder opens the folder with the MP4, ready to post.
Reelcutter saves them in Movies → Reelcutter unless you choose another folder in Settings.
Tips for good reels
- Talks, interviews, lessons and podcasts work best: one or two people, facing the camera.
- In a wide shot with two people, Reelcutter keeps the person who is in view the longest. Choose the part around the person you want, or use manual framing (Premium).
- Use Center for slides, screens or anything without a person.
- Keep reels short. Free reels can be up to 60 seconds; Premium up to 3 minutes.